The volume control knob for my PC speakers has been intermittent as long as I’ve had them. Sometimes the left or right channel drops out entirely, other times one of the channels is quieter than the other. I’m not sure why it took me so long to realise I had the means to replace it but here we are.
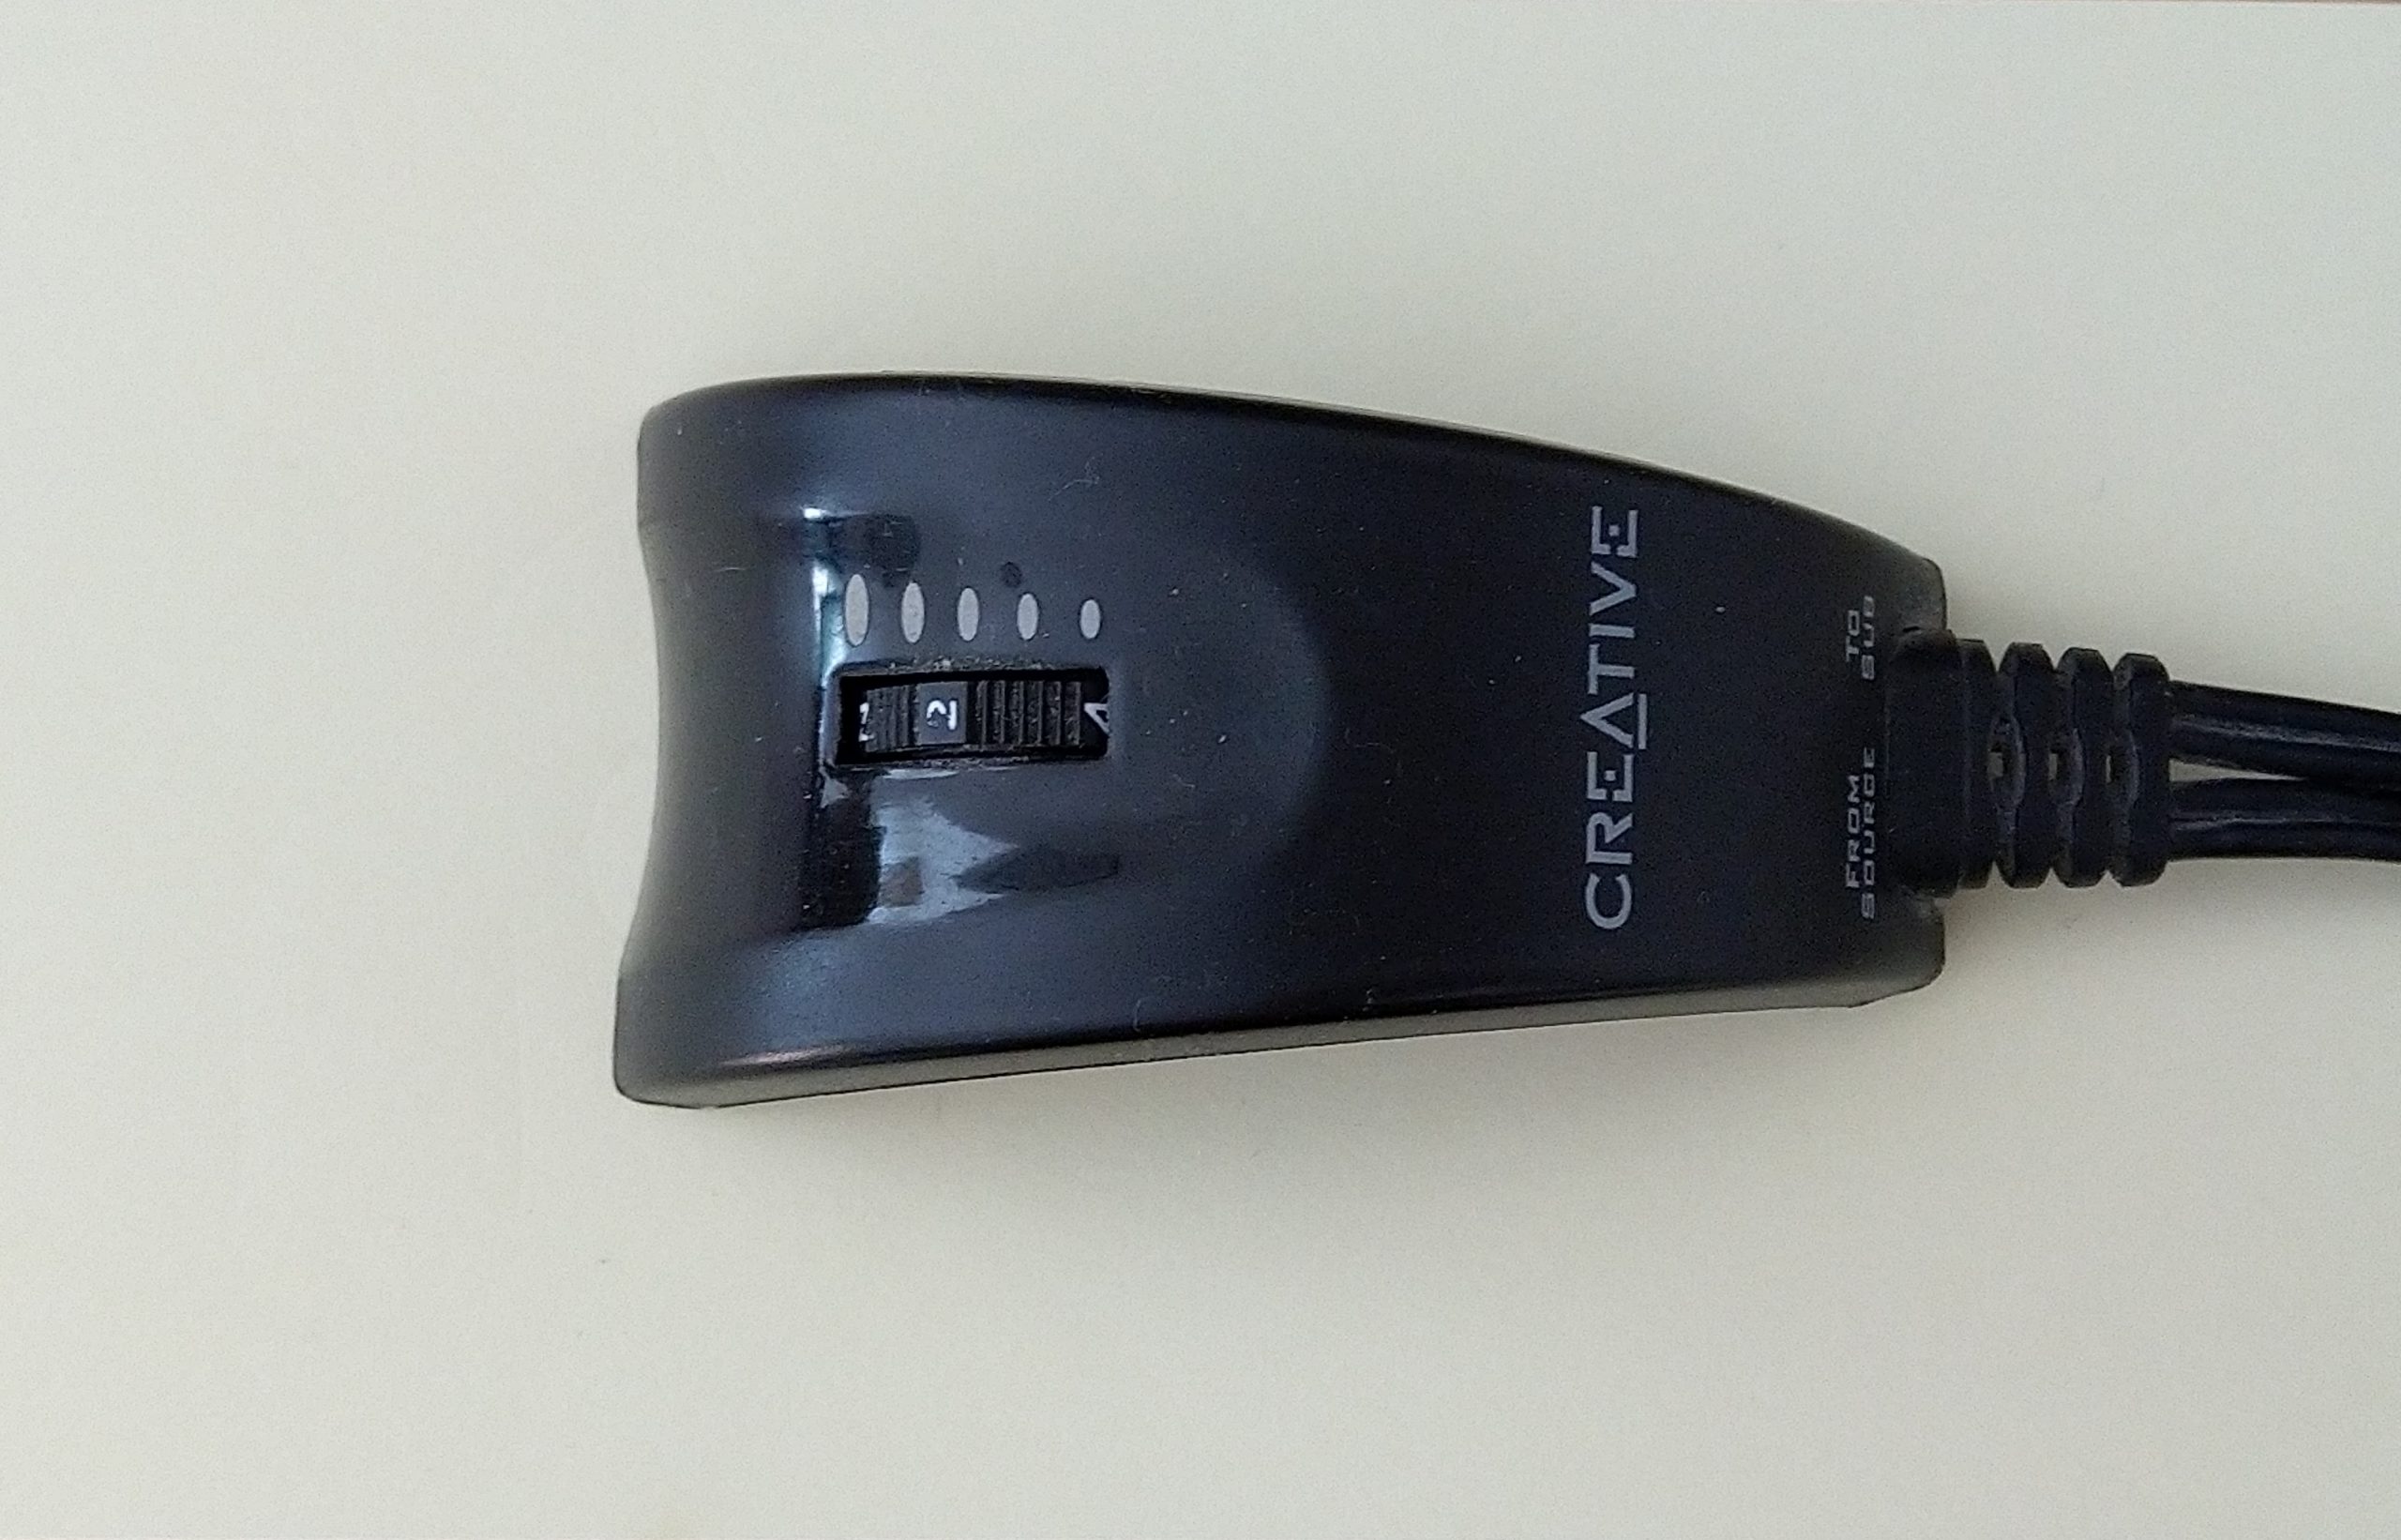
This is the original volume control that we started with. I’ve found a sweet spot around the “2” mark and never move the wheel from that point.
The case was easy enough to get into, just three screws holding it together. Inside was a single-sided PCB and a surprisingly low-profile 10KΩ potentiometer. A quick search found replacements for less than a dollar on AliExpress so in theory I could have replaced it like for like but where’s the fun in that?
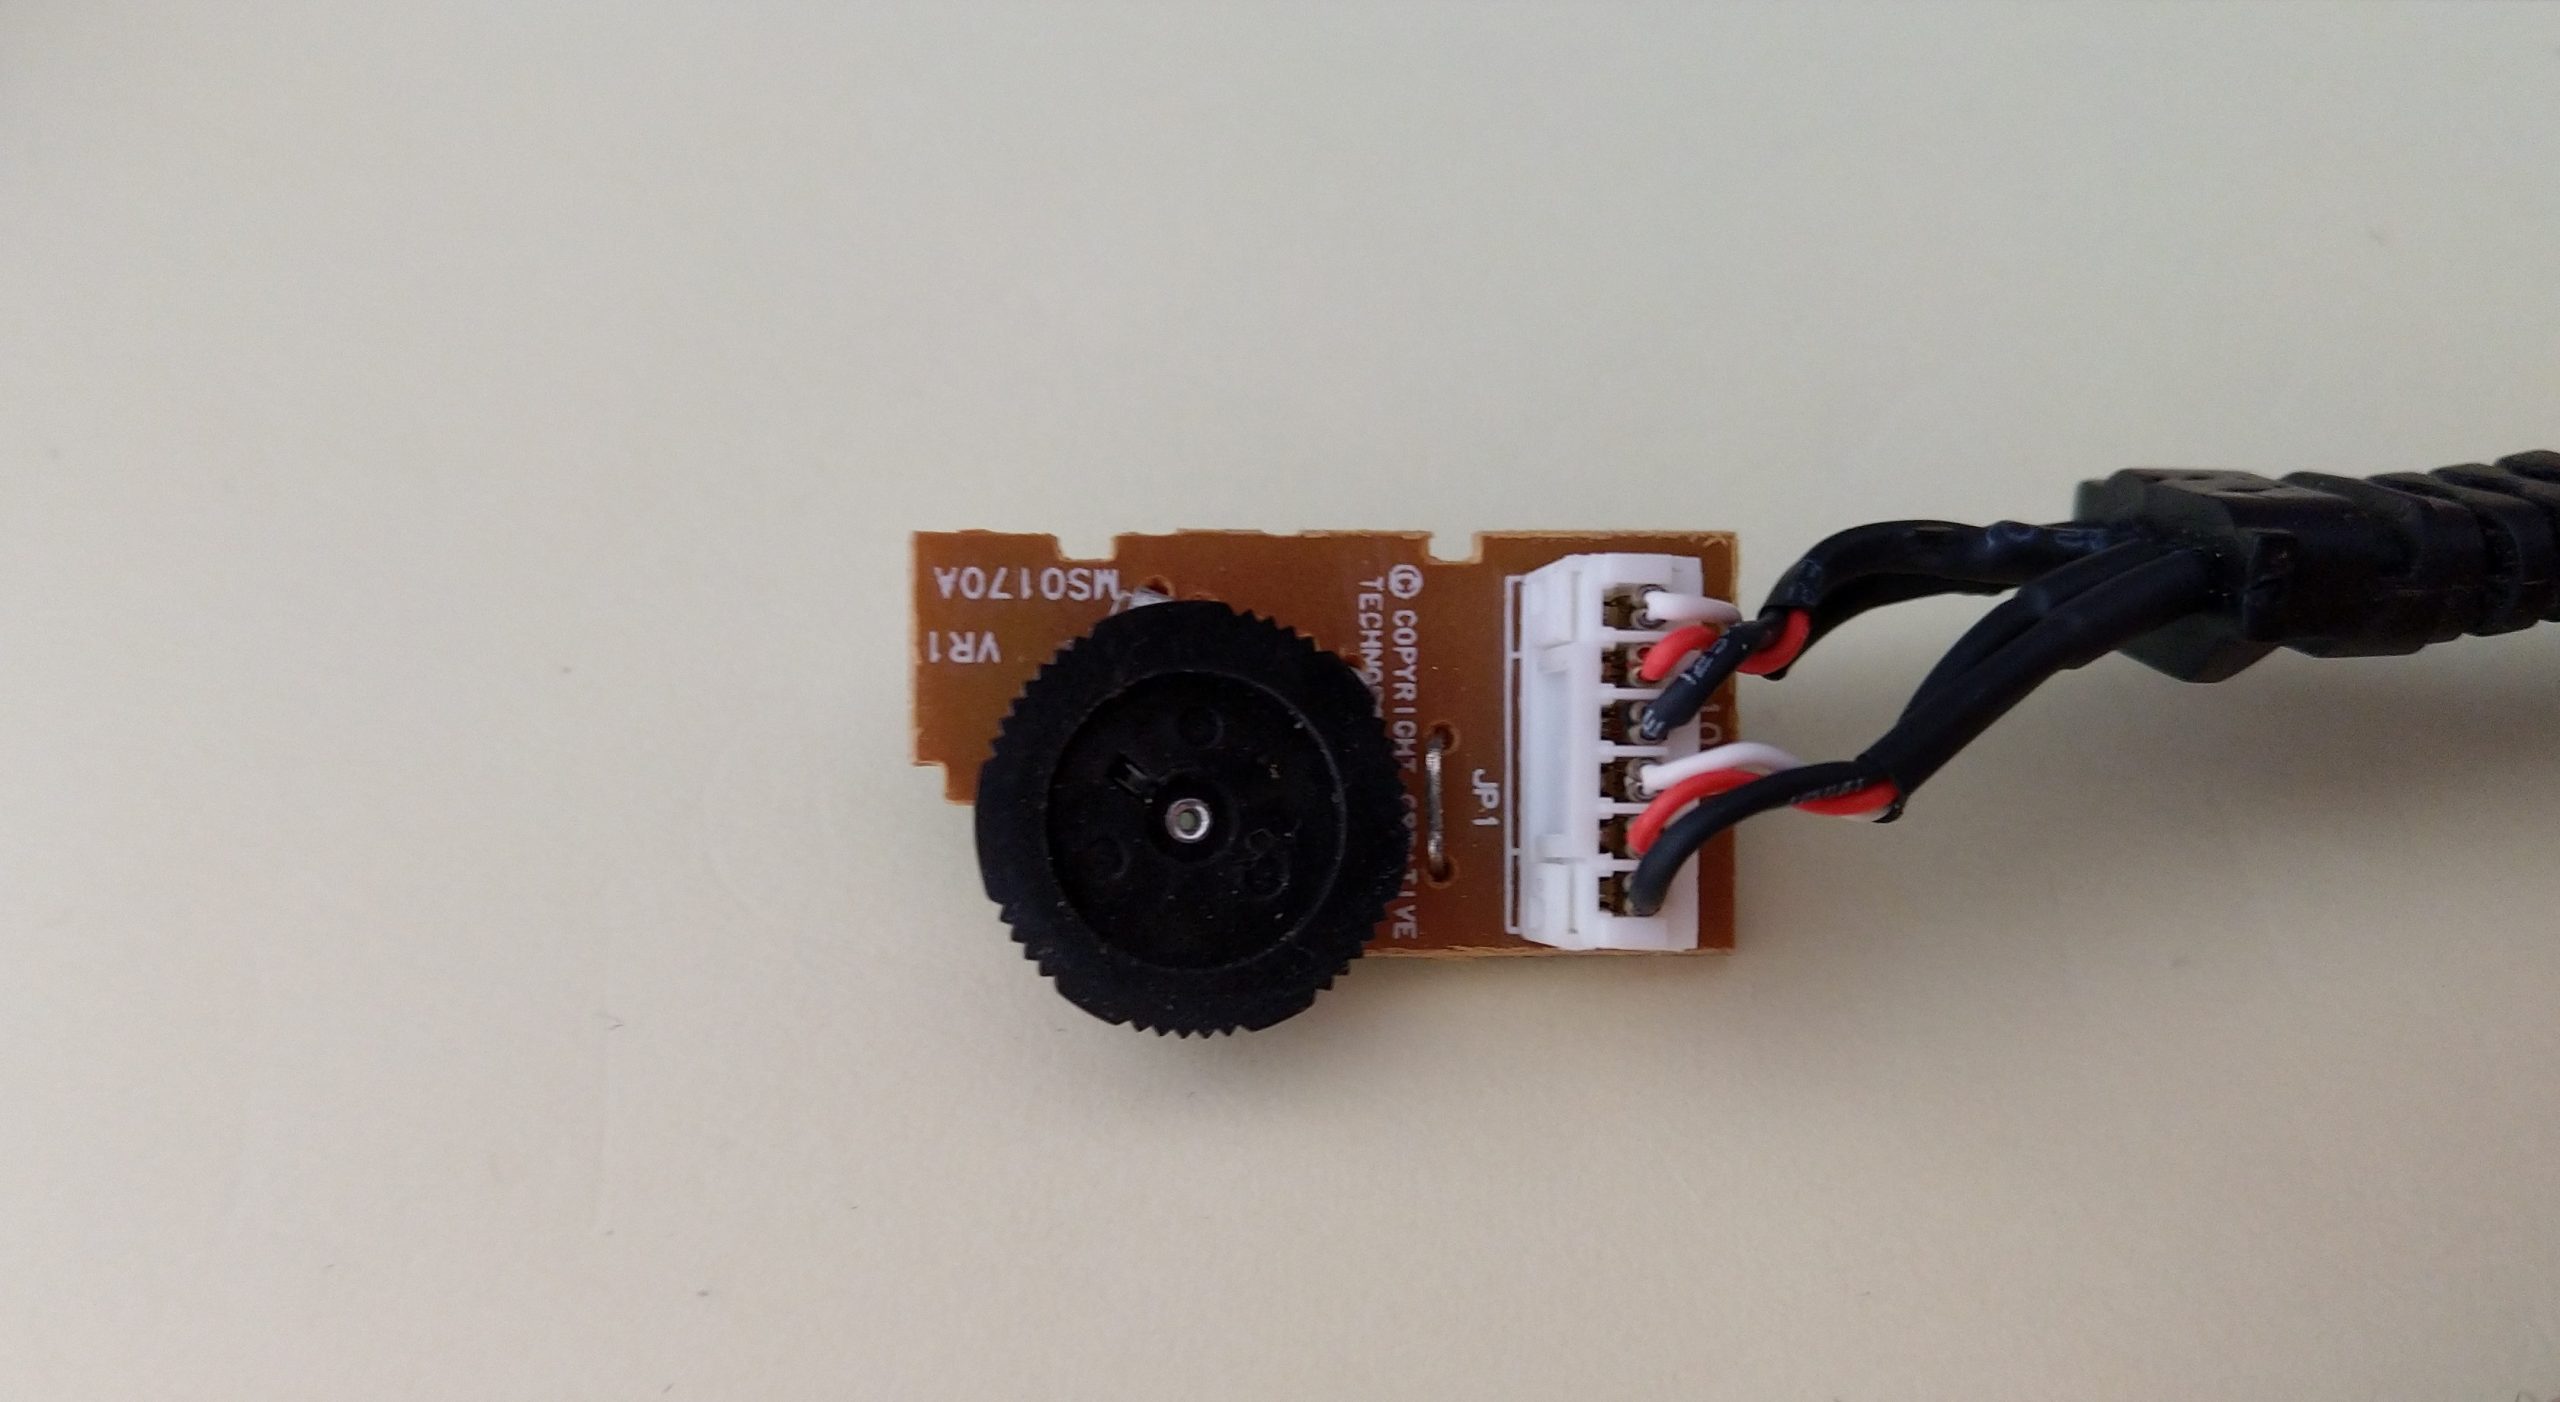
The top three wires are input left, input right and ground respectively. Similarly, the bottom three wires are output left, output right and ground. A bit of probing with the multi-meter confirmed what I’d noticed, there are several areas in the travel of the wheel where there is no connection.
The first step was to remove the wires from their connector and strip them. While doing this I also chose to remove the plastic strain-relief as it would give me a bit more freedom to manoeuvre the wires later.
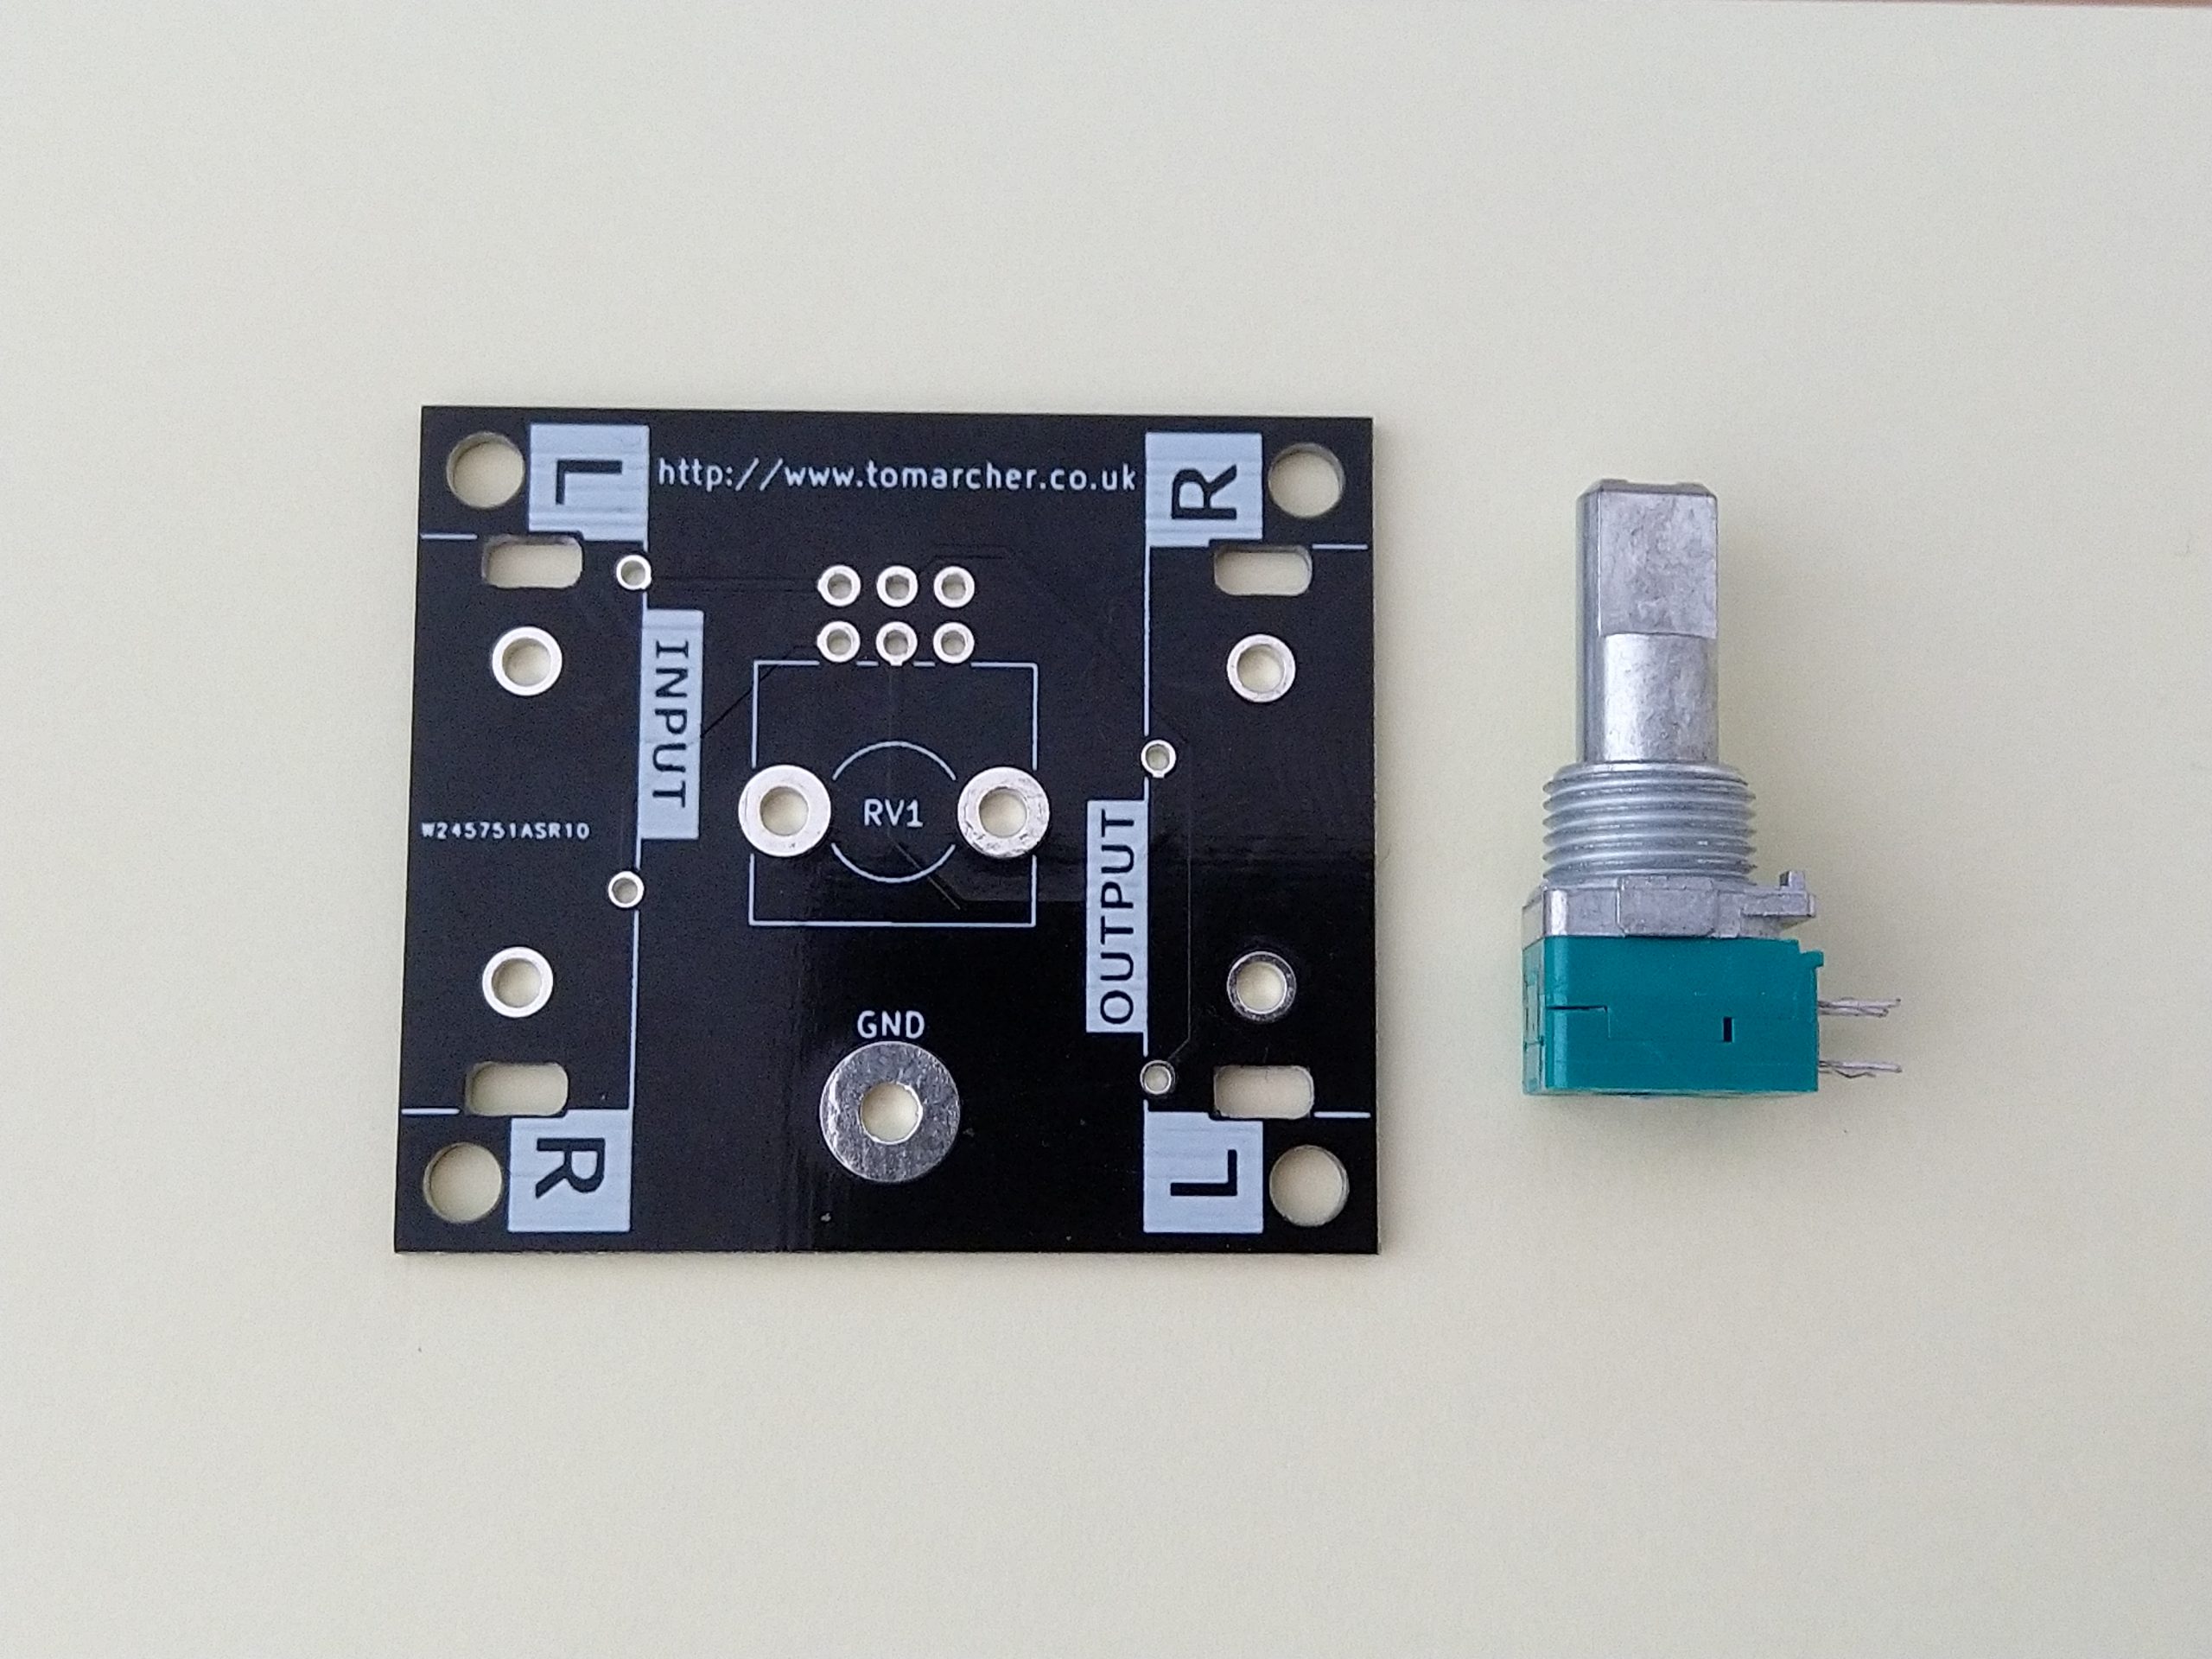
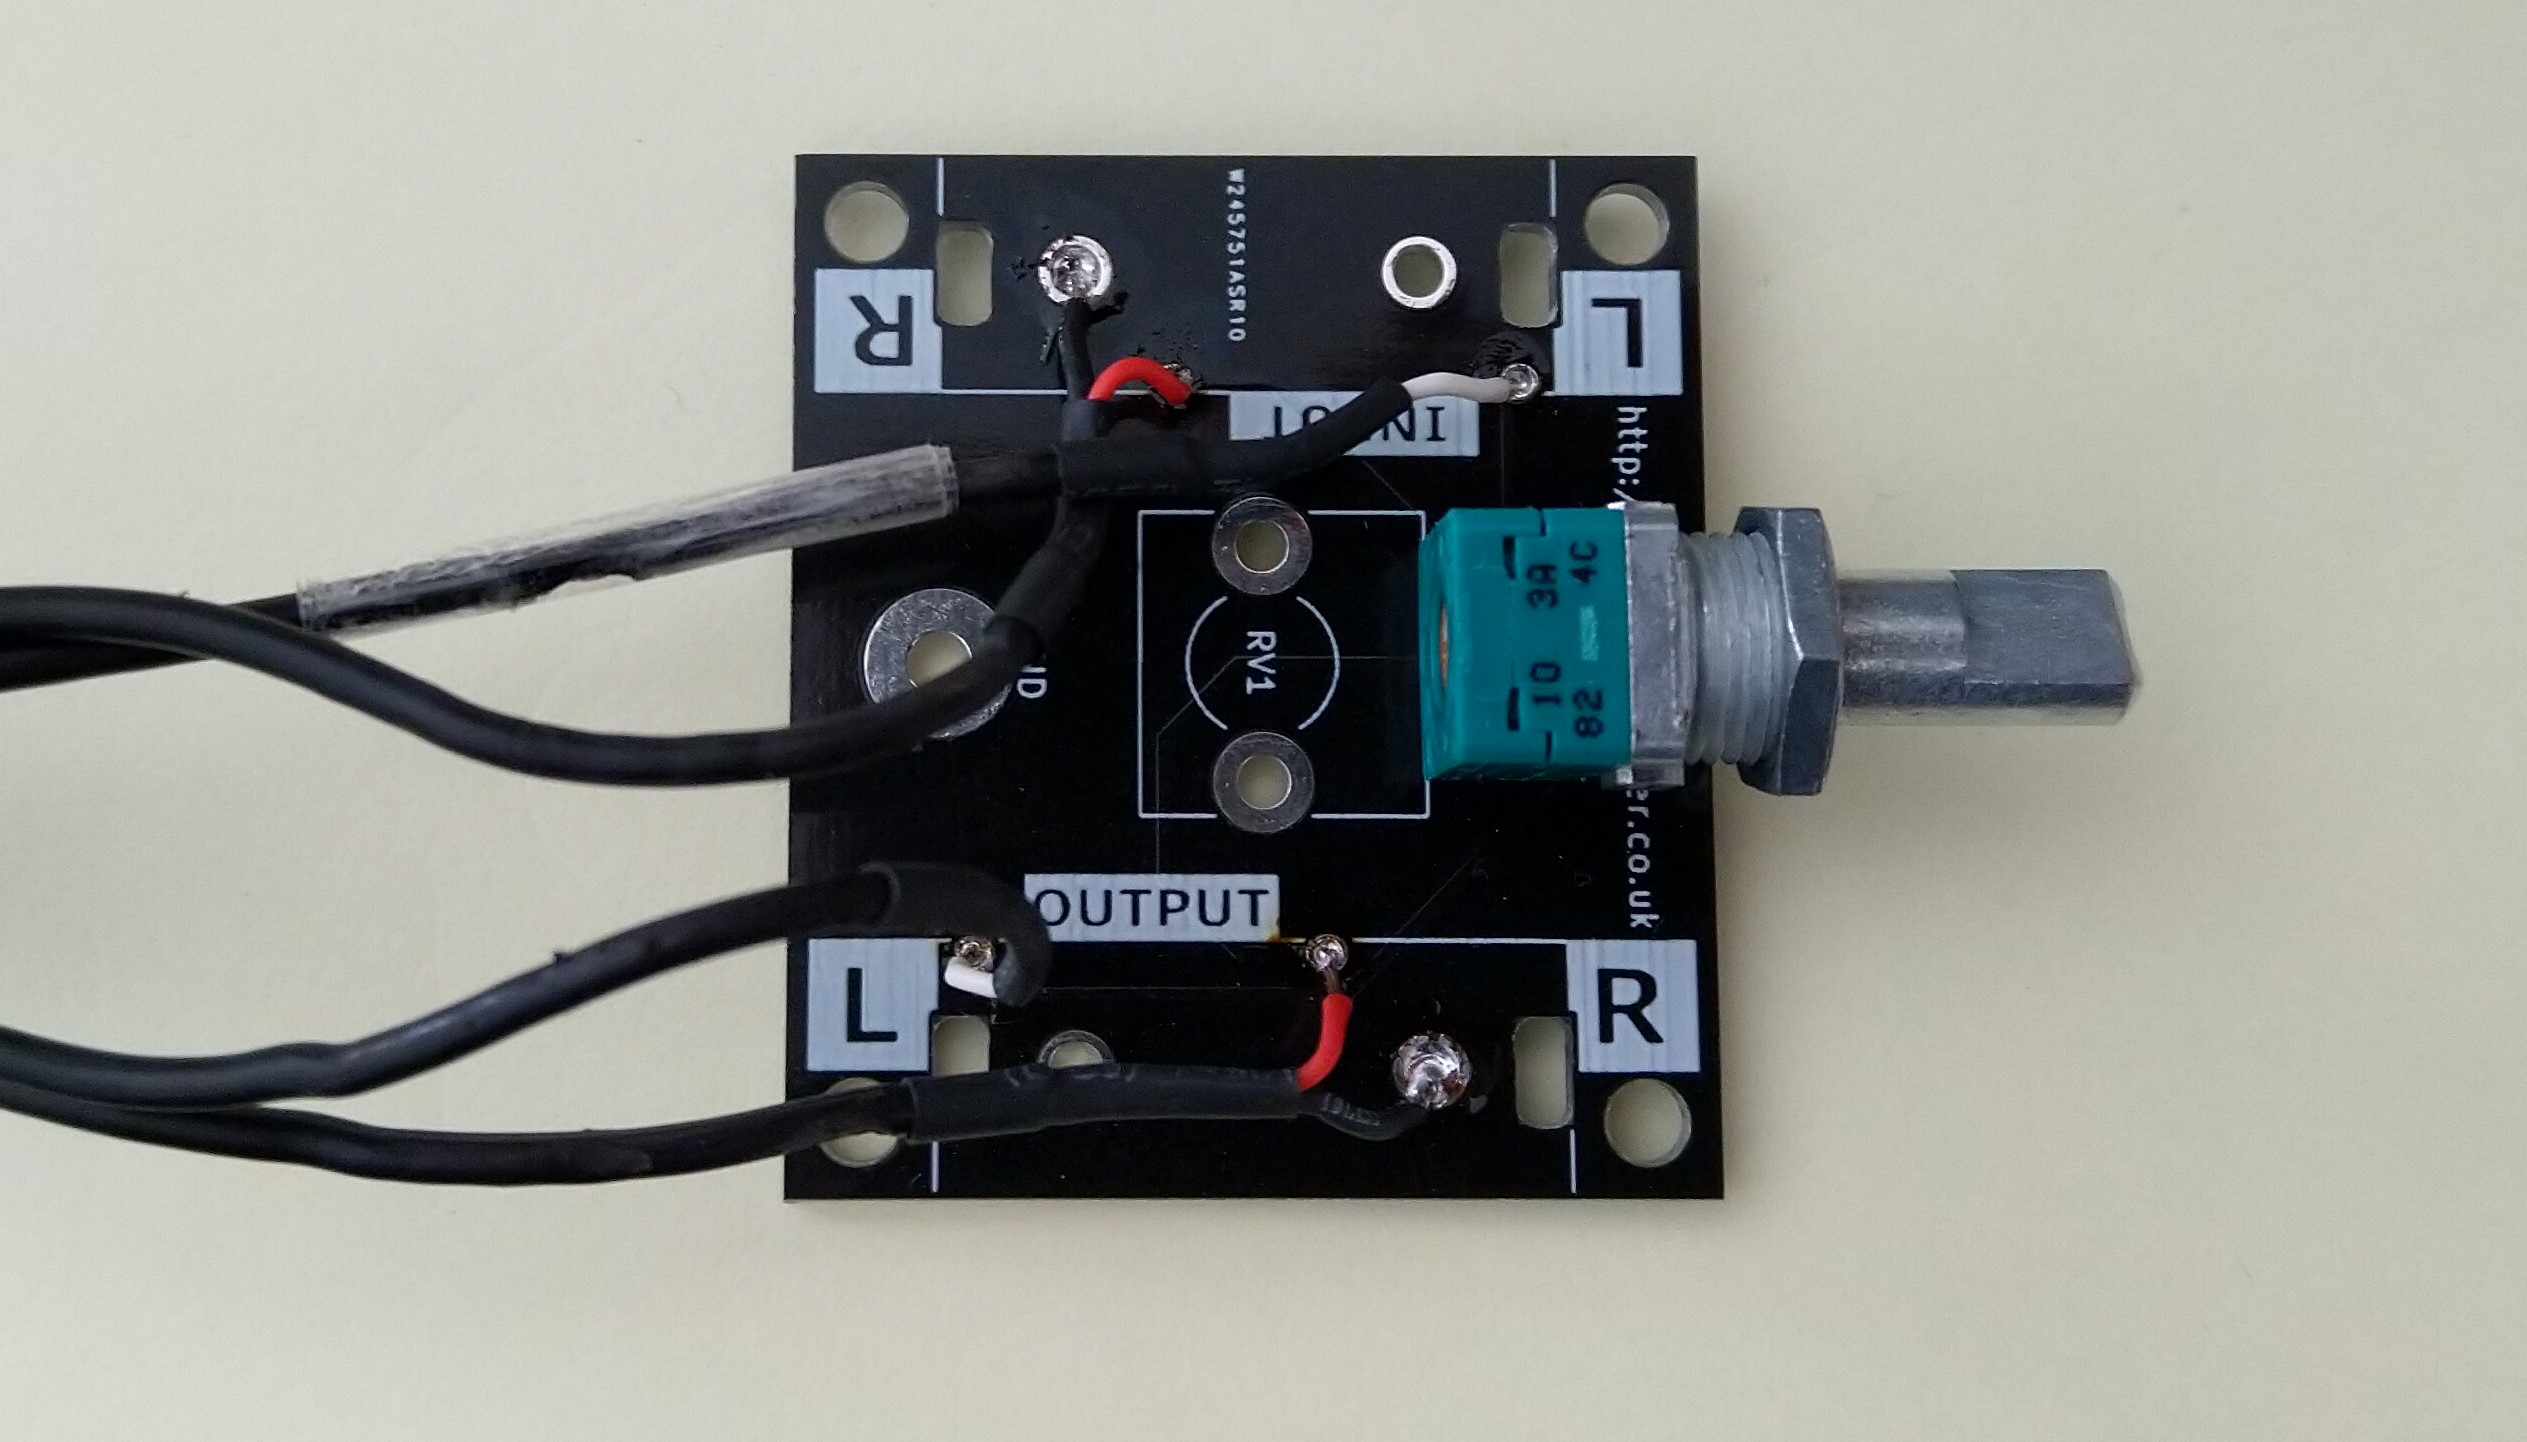
We get to re-use the PCB from the RCA Audio Attenuator project, albeit I chose to go with a right-angled potentiometer this time around. No need for RCA jacks as I intend to just solder directly to the PCB.
Here’s the board soldered up, I soldered the red and white wires to their respective places on the PCB and the black wires to the nearest available ground connection. You can see in this image I slightly nicked one of the wires while removing the strain-relief. It at least proves a handy indicator of the ‘input’ wires.
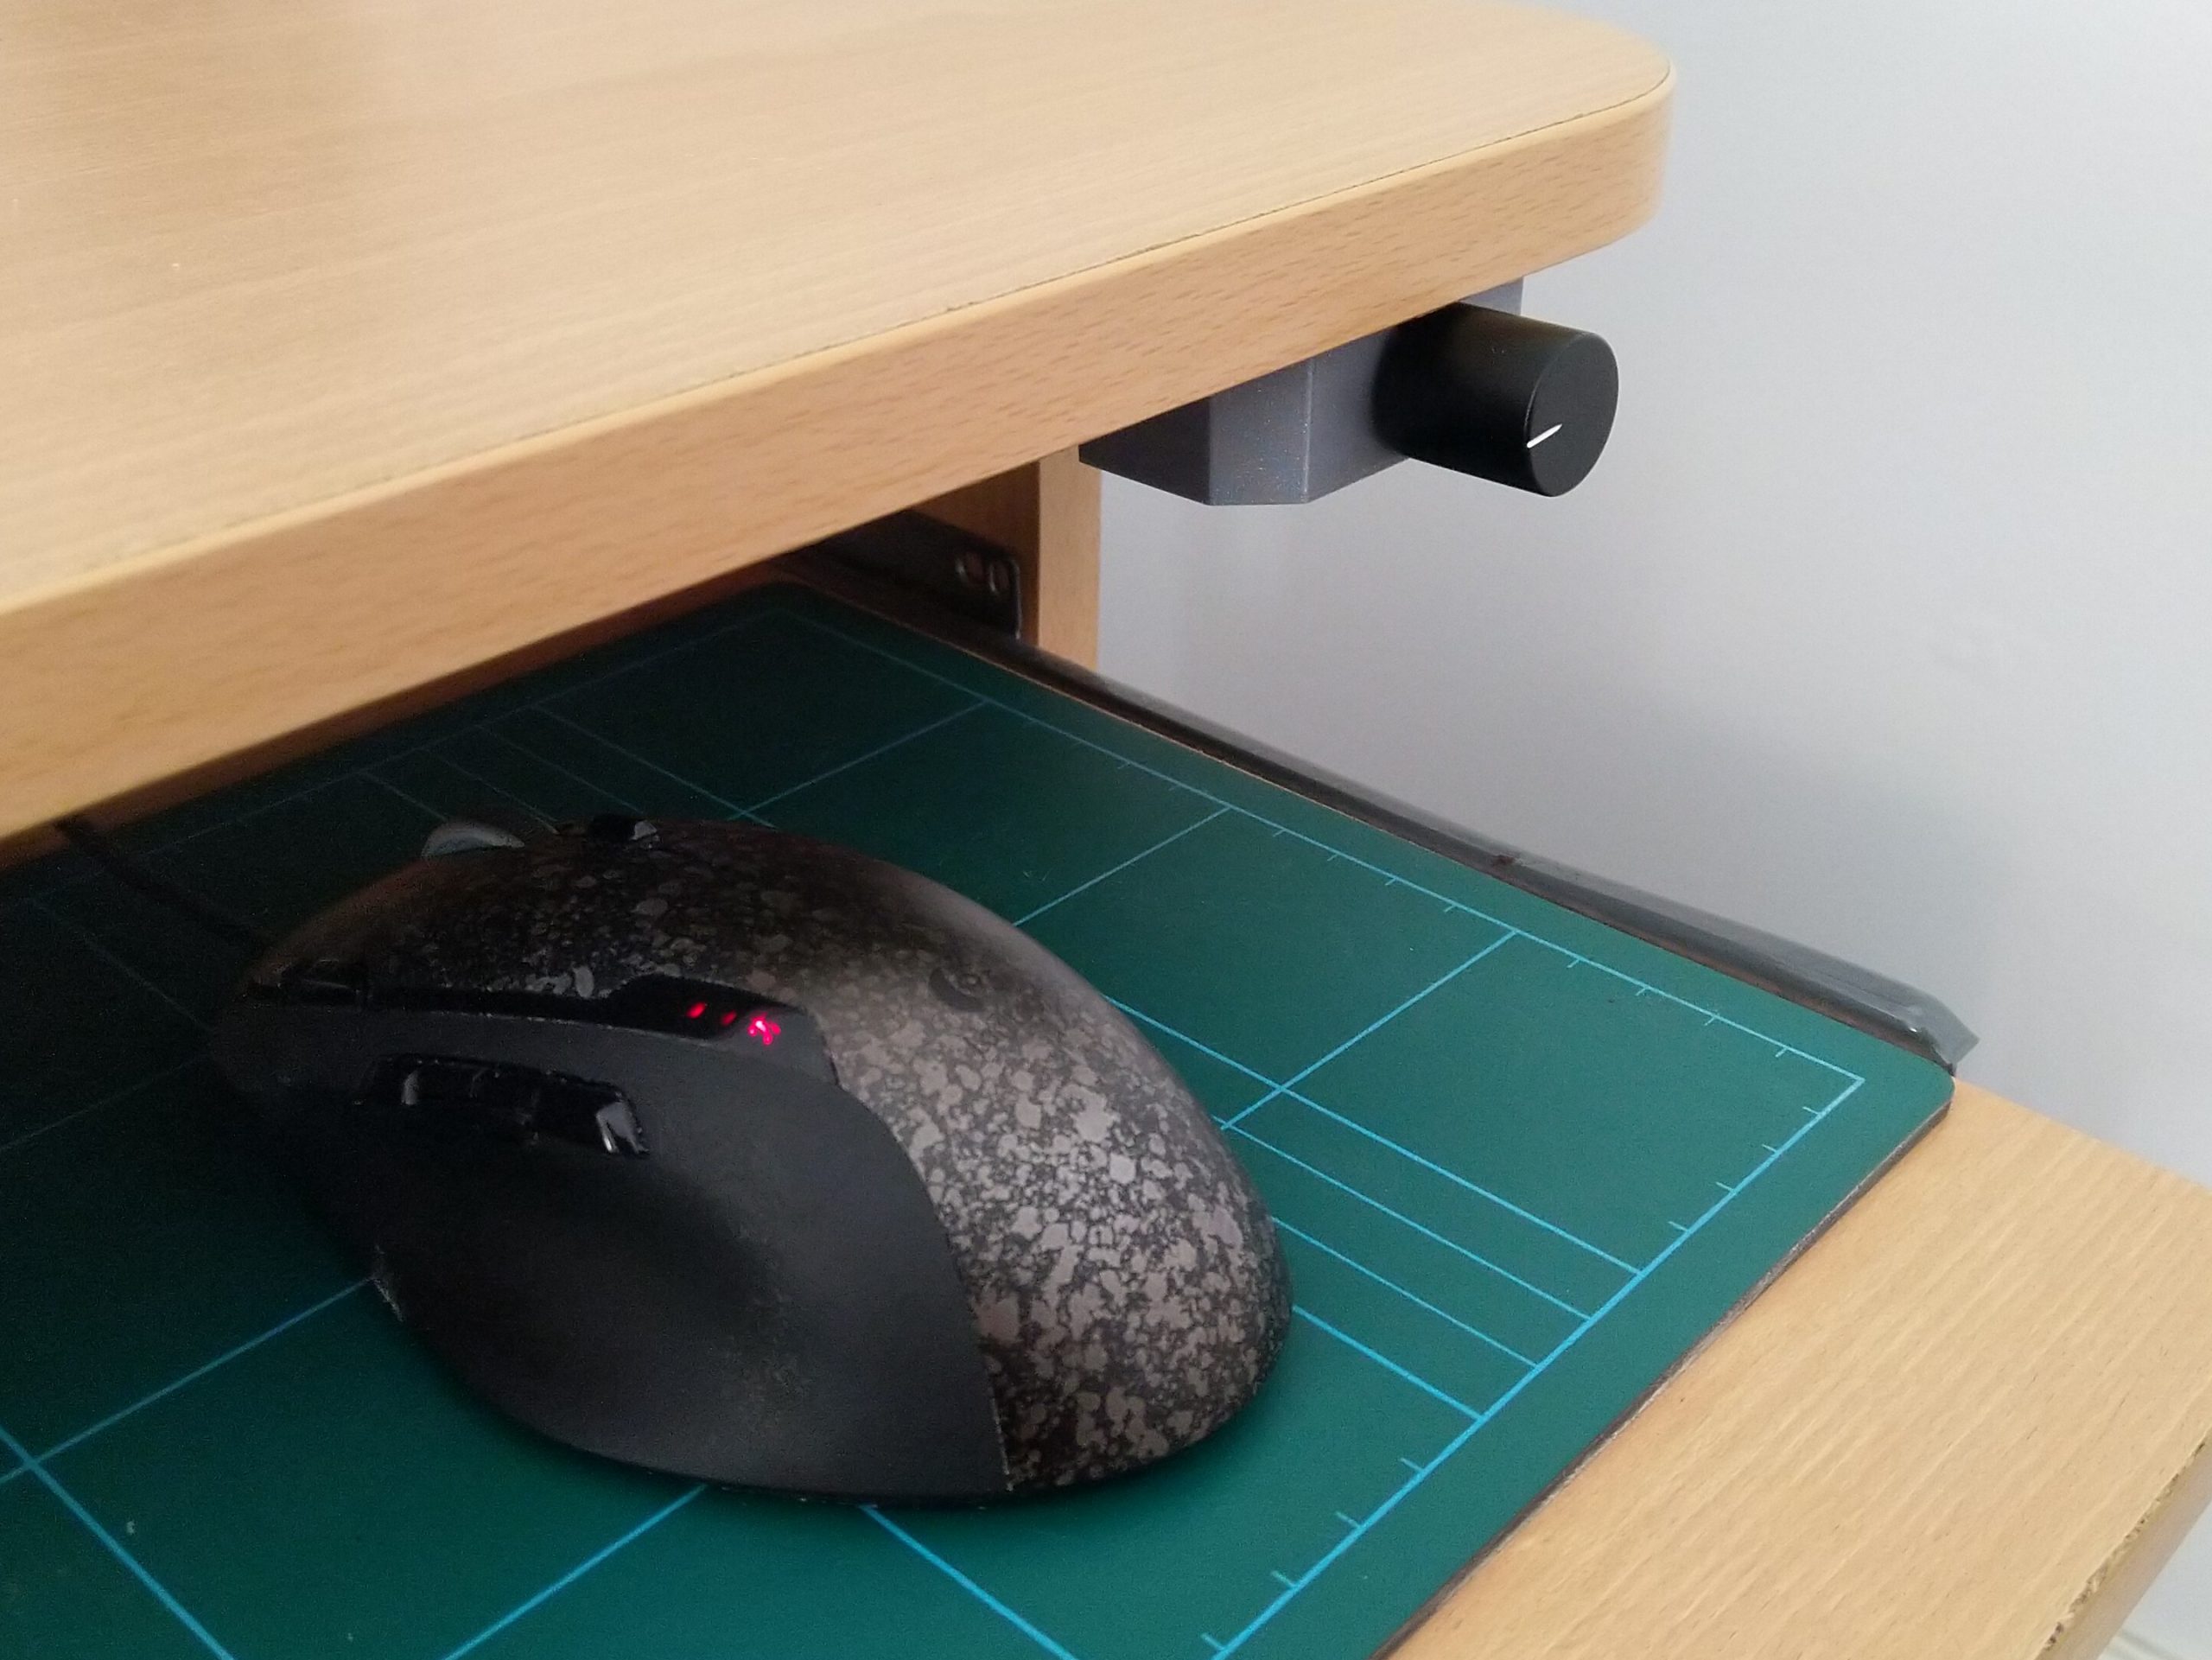
This thing obviously needs a 3D-printed case so I grabbed my old models and designed one.
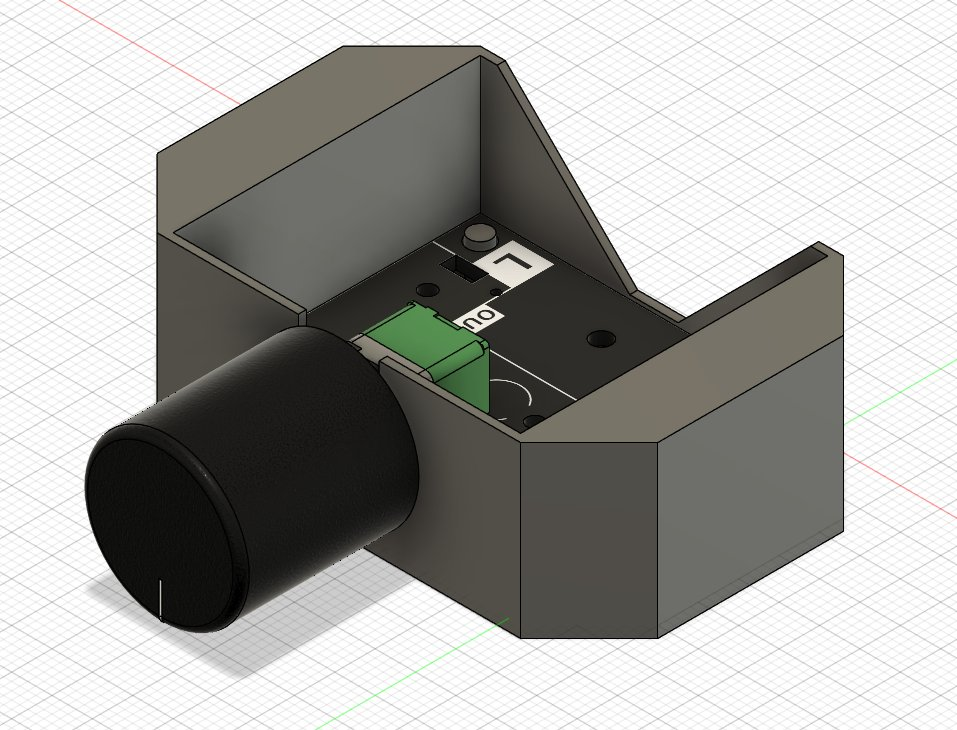
It’s a rather simple case since the plan for this is to mount it under a desk-top so it will mostly be hidden. I chose to go for a slightly slimmer aluminium knob for the same reason.
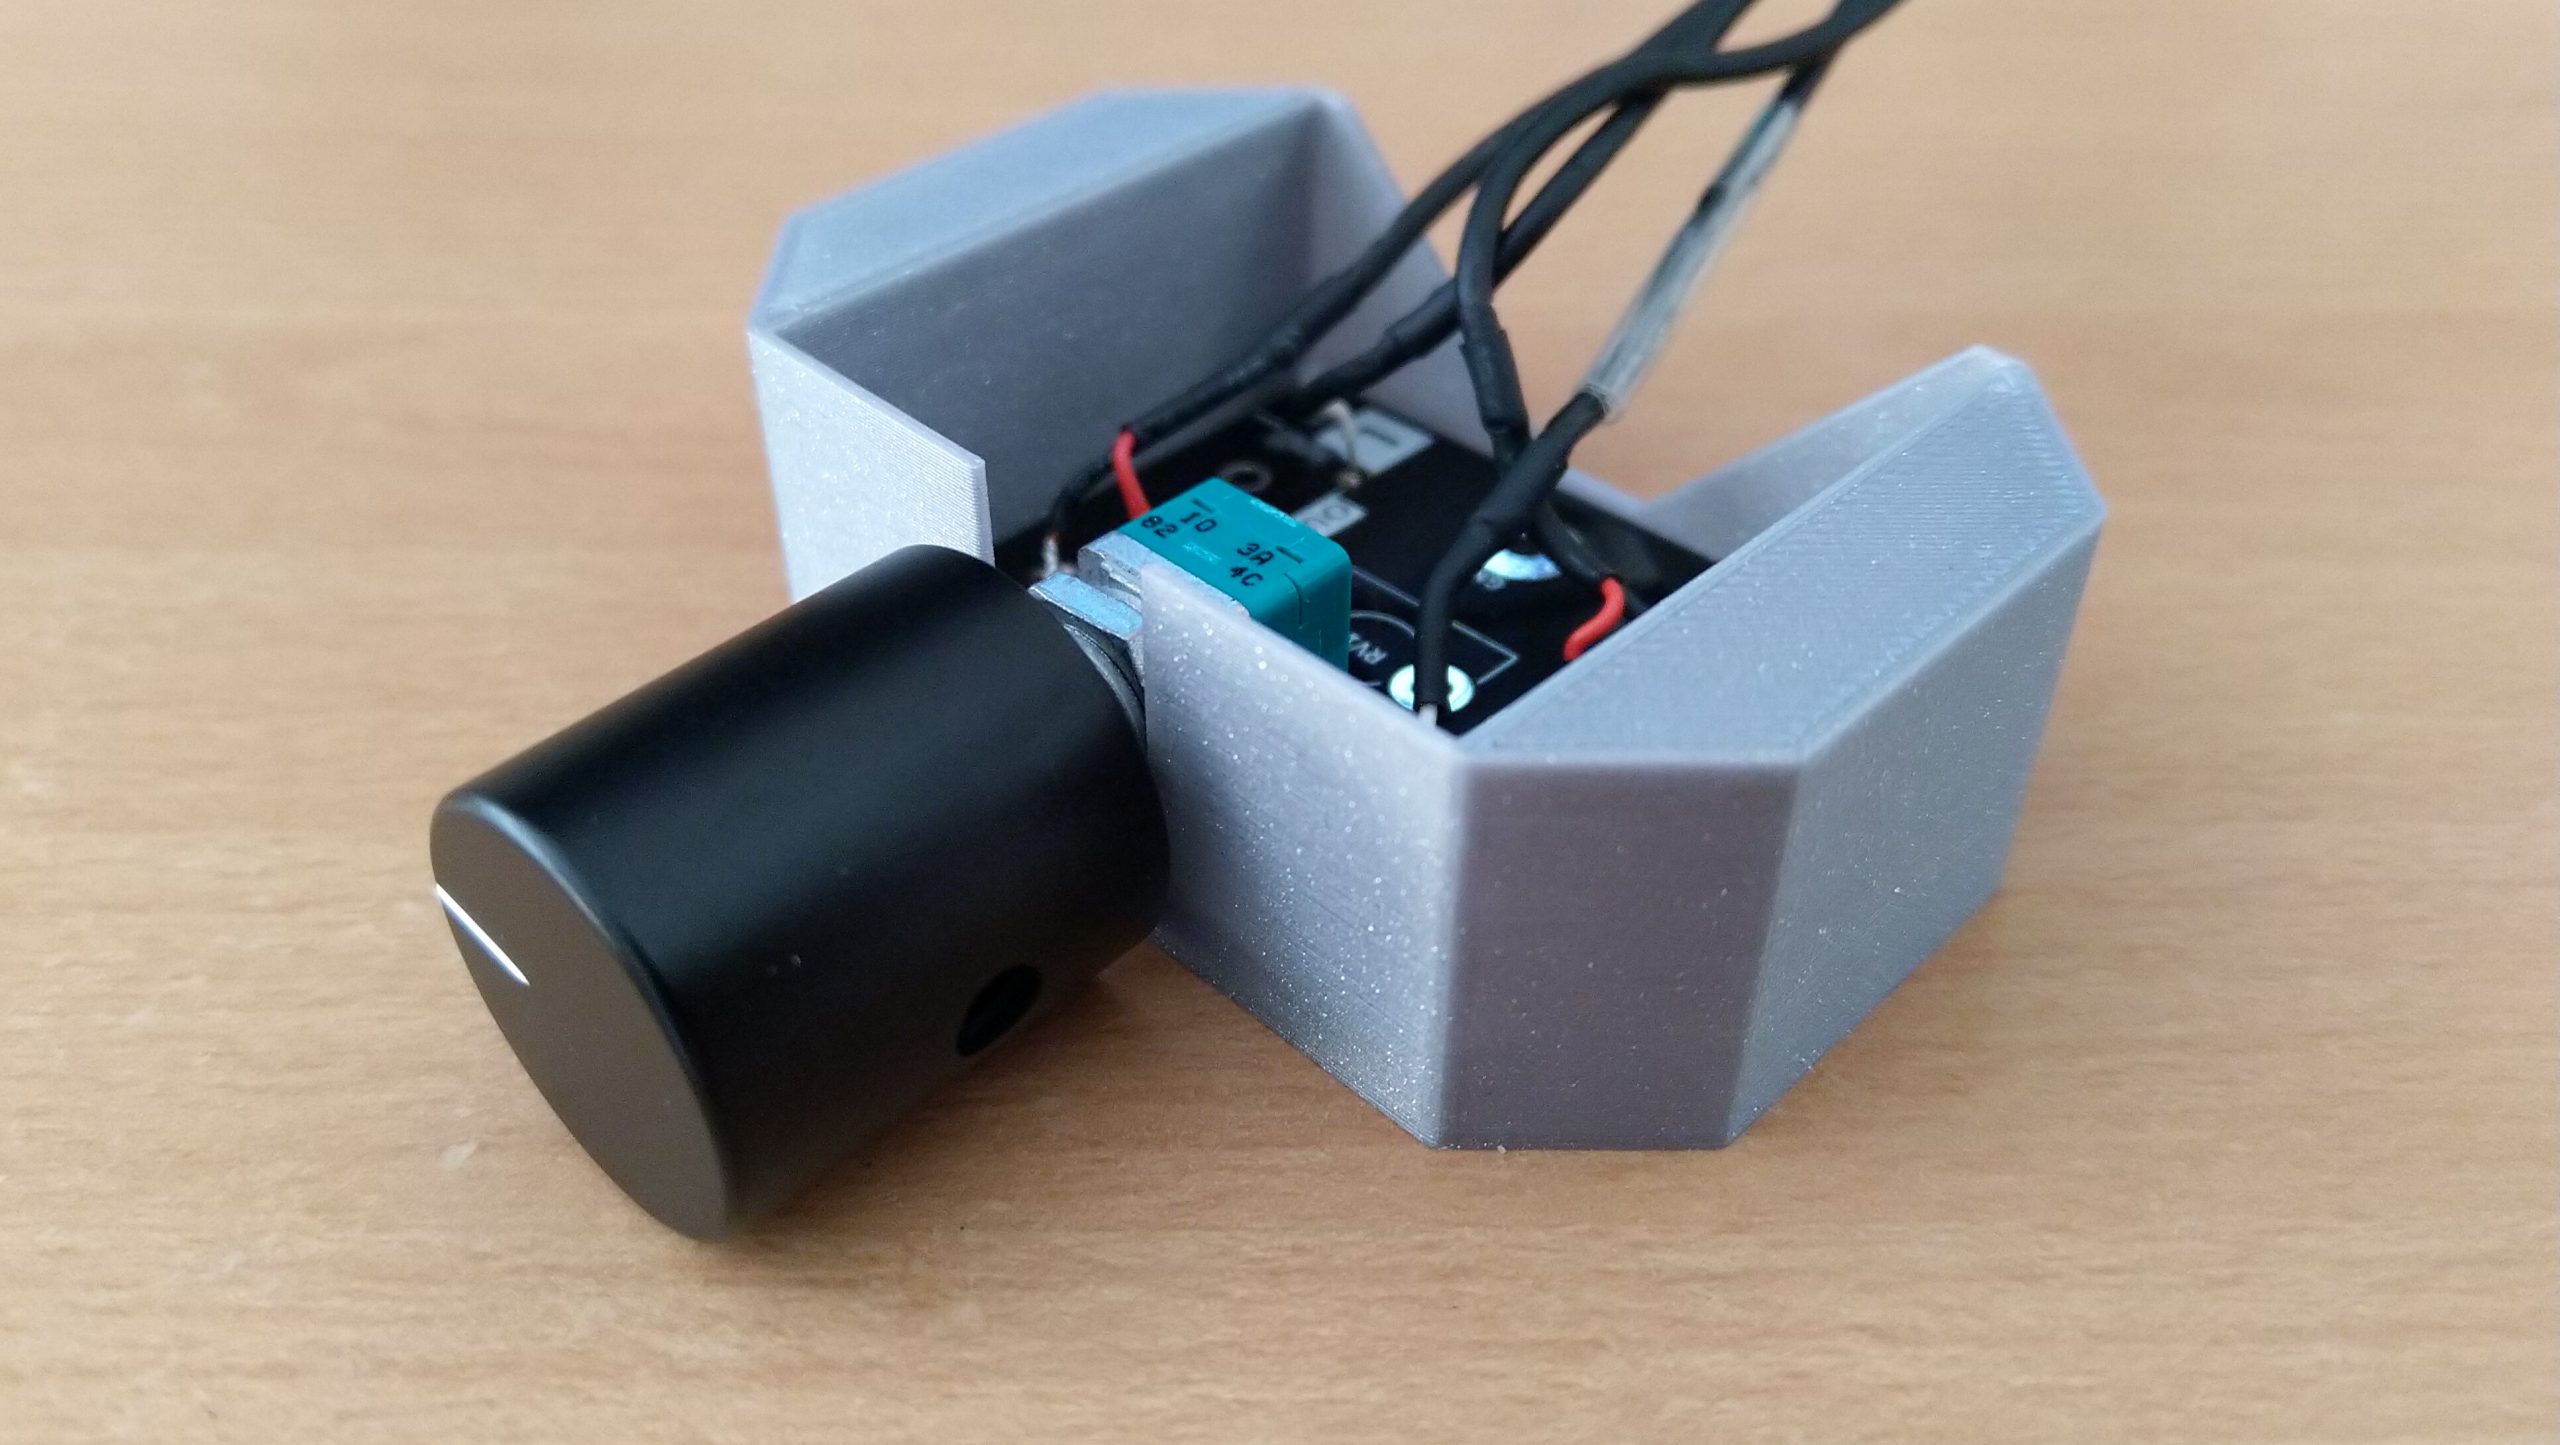
Rather than use screws to mount the PCB inside the case I made the little posts slightly long and melted them over the PCB to hold it in the case. The finished result is really nice. The heavy knob is very satisfying to turn and it’s nice that there’s no more crackling!