At the culmination of what I’ll now call “version 1” of the Battlestar Chronometer, I highlighted a few things that I’d like to improve in a future version. It didn’t take long for me to start on “version 2”.
To summarise the issues with version 1:
- The wiring was a bit of a rats nest. A larger PCB would be able to host the LED matrix drivers and the traces connecting them to the matrix. This might also eliminate some of the LED flicker present in the previous version.
- The yellow “seconds” segments were quite dim compared to the red “minutes” segments. Since the they shared a matrix driver there was no way to reduce the brightness of the red LEDs without also affecting the yellow LEDs. Separate matrix drivers would allow for finer control of each ring’s brightness.
- The illumination of the large “hours” segments was a bit patchy. Adding a second LED for each of the segments would provide a bit of a boost.
Work on version 2 began almost immediately after the previous post was completed. What started as just a programming challenge eventually became something that I wanted to get fabricated.
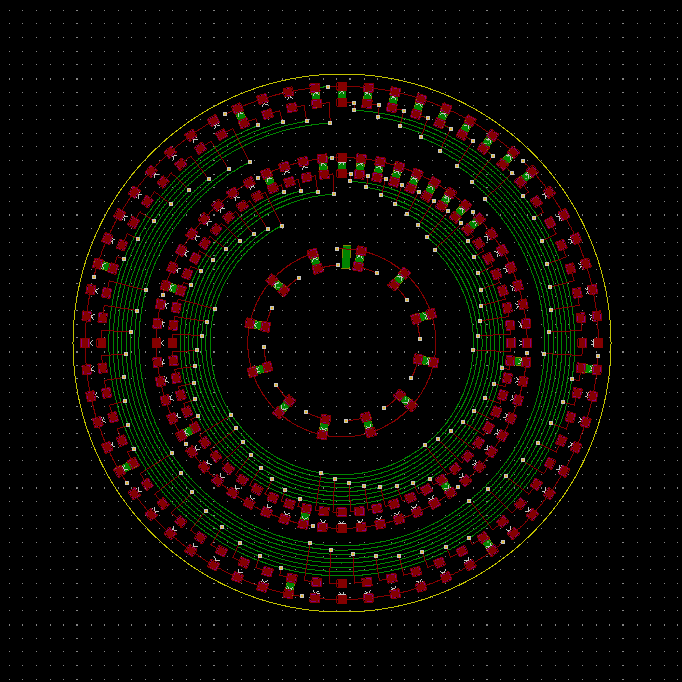
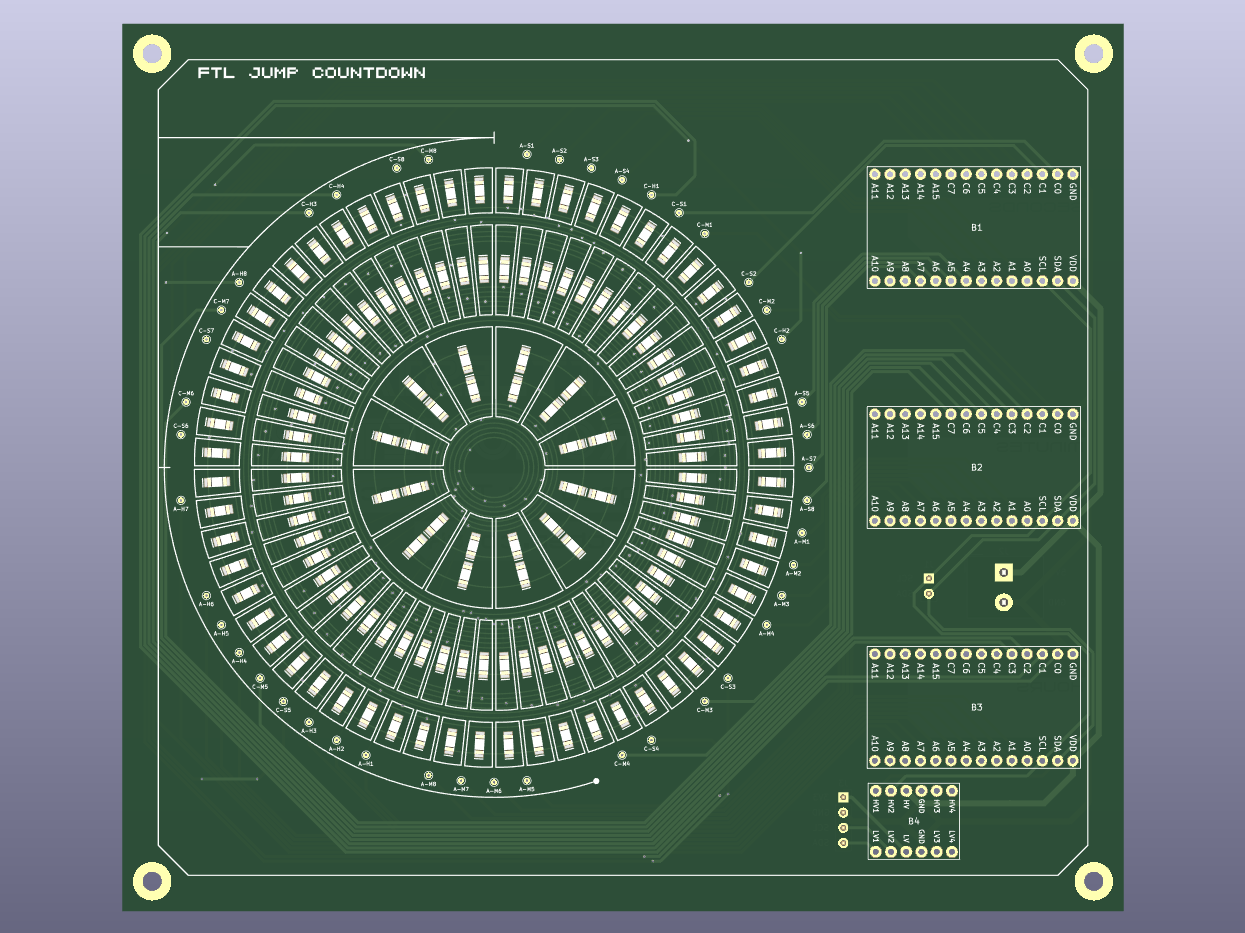
The Python code I’d written to lay out the LED matrix in version 1 came together quite organically and was in much need of a refactoring. The solder pads that were present on the back side of the PCB are no longer needed so were removed in favour of some test points on the front. This should make debugging any issues with LEDs much simpler.
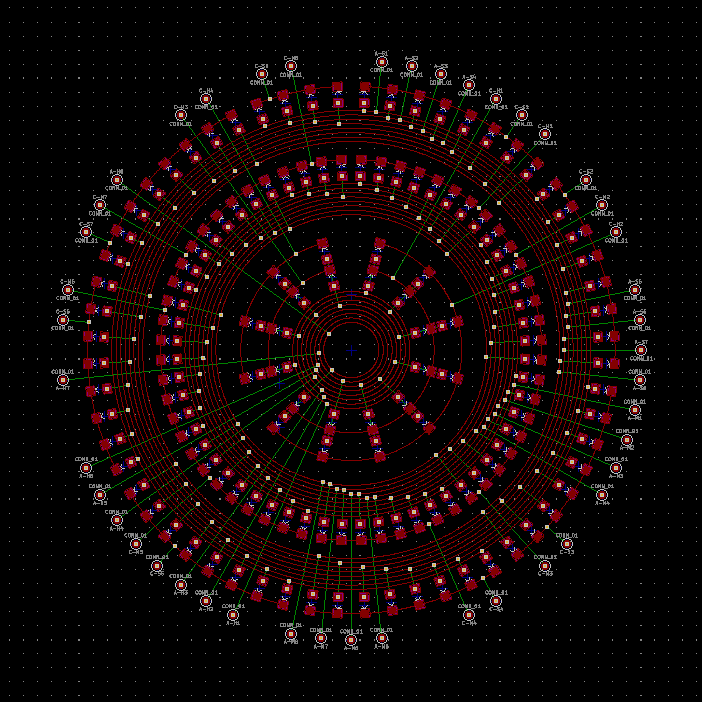
The big challenge here was extending the anode and cathode connections from the “inside” of the matrix to the test pads on the circumference. It’s these test pads which will then be connected to the matrix drivers.
A comparison of the version 1 and version 2 LED matrixces is shown below.
I had originally planned to use discrete matrix driver chips along with the various resistors, diodes and capacitors required. This was proving to be a bit of a headache to route, so instead I’ve opted to use the breakout boards that I used in version 1, so I suppose this is more of a “version 1.99”. If all goes well, I’ll consider using discrete components for version 2. I’ve stuck with the HT16K33 as I’ve been unable to find a suitable replacement.
Connecting the matrix drivers to the matrix had to be done by hand and since the various connection points are spread around the circumference of the matrix it was a bit of a challenge. A challenge I made more difficult as I was determined to come up with a satisfying layout of the traces that used minimal vias.
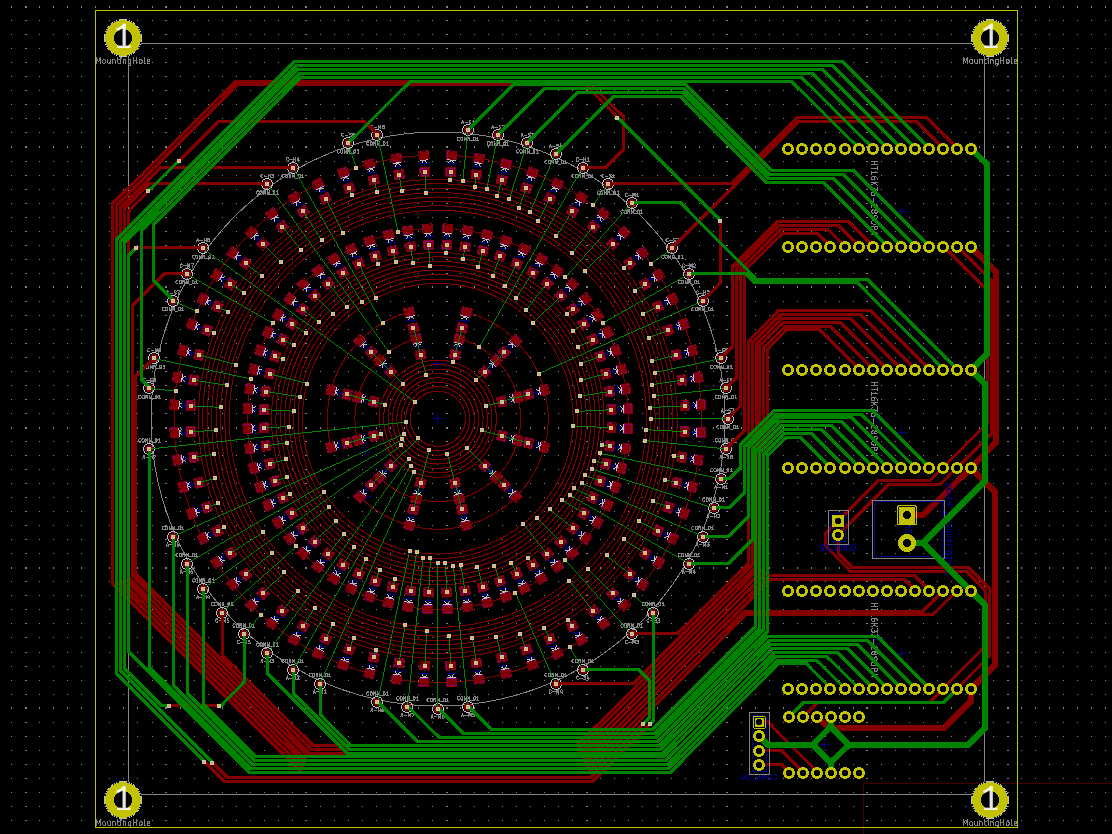
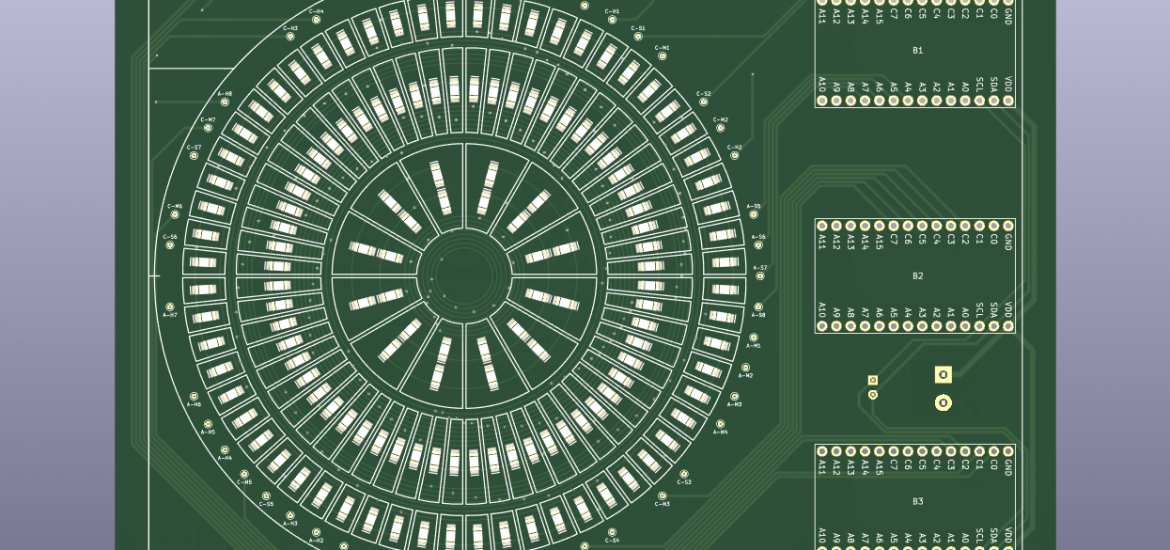
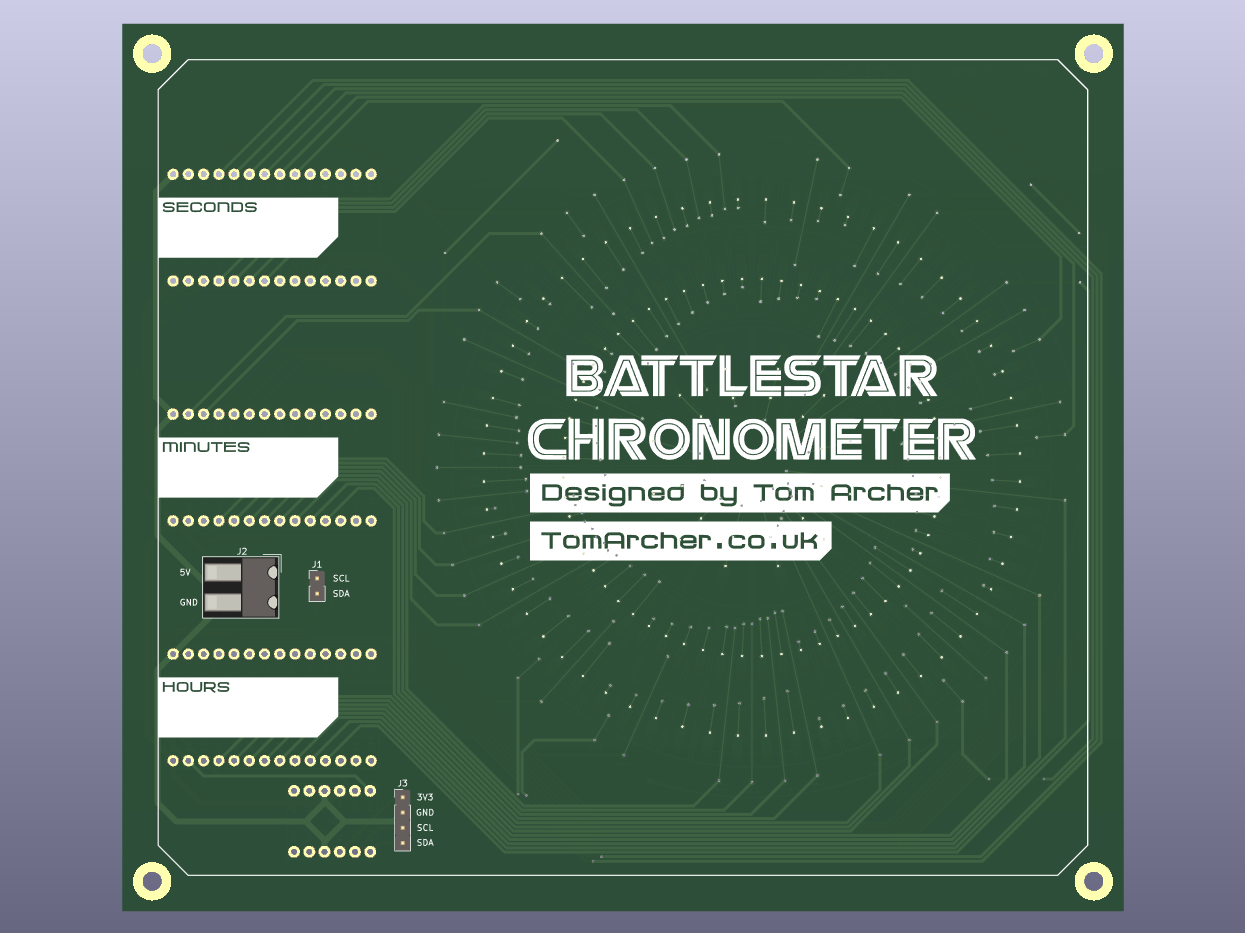
Alongside the matrix driver breakout boards, I’ve included a screw terminal for 5V power and a header for (5V) I2C communication. There’s also space for an optional logic level converter and a header for 3V3 power and I2C communication. In version 1 this logic level converter lived on a piece of proto-board so it made sense to host it on the main PCB since I had the space. Three matrix drivers might not be necessary but it should give me some flexibility with LED brightness.
The board size was originally much bigger at A5 paper size, 148x210mm. There was a lot of free space and it would have pushed up fabrication costs. I’ve managed to shrink the board down to 148x167mm. If I stick with the same frame size, this might let me squeeze in a seven-segment display (or two) in the left over space.
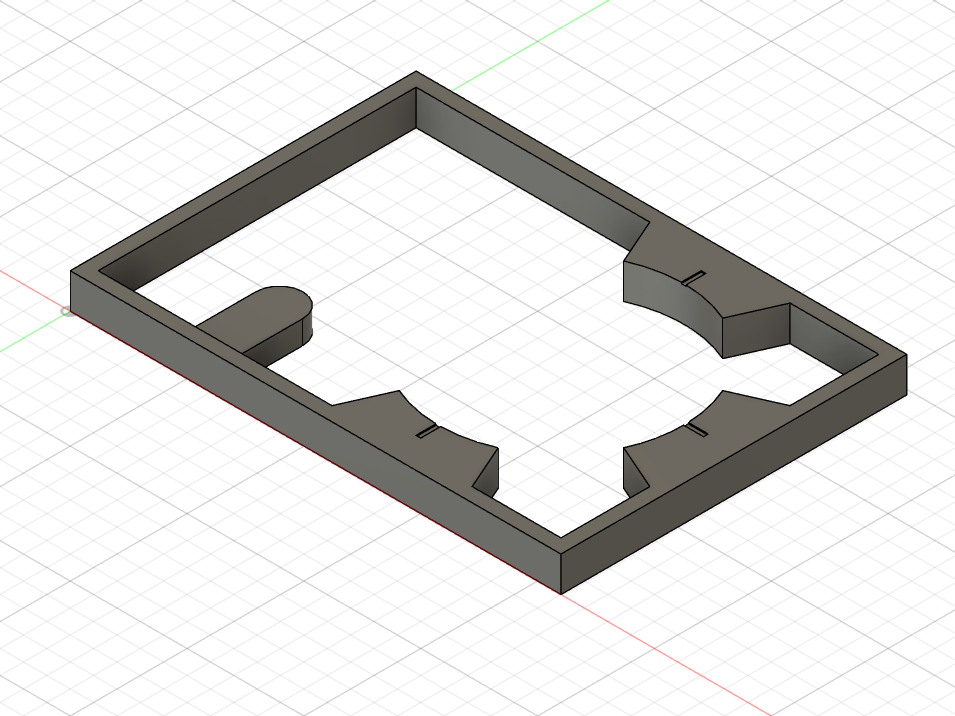
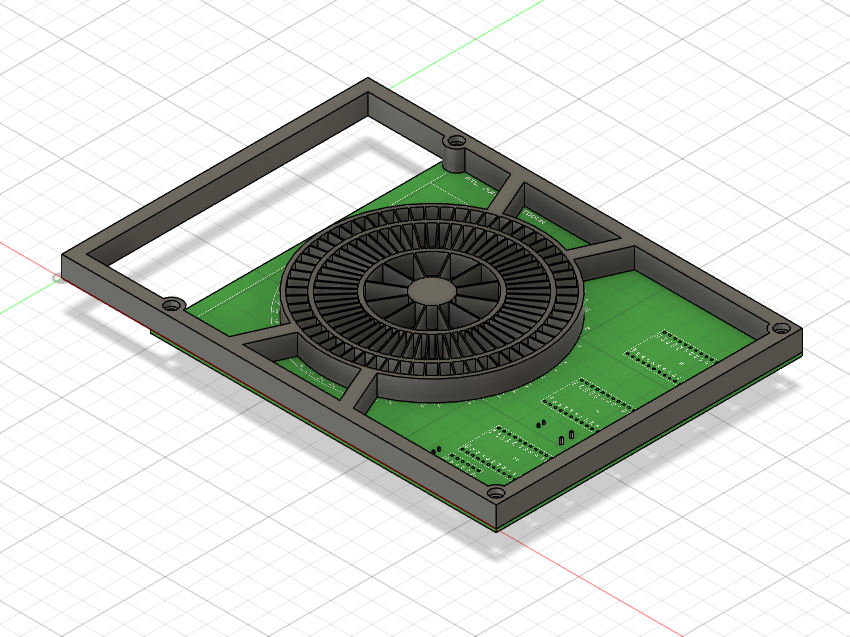
The version 1 matrix ended up being mounted offset in the frame. Shrinking the board allows the matrix to be positioned centrally in the frame. The LED light guide has also been incorporated in the frame rather than being a separate print. The larger PCB also allows for mounting holes, which should help with alignment of the board and frame.
Finally the board was embellished with some thematic graphics. I did have plans for more text on the front side but this was sacrificed with the reduction in board size. I have some ideas about laser etching the front acrylic so it might make a return there.
All that’s left is for me to get it sent off for fabrication and get some of the parts ordered. I’ve considered PCBA but it’s a bit of an alien process to me, maybe for the “actual” version 2?